
Instead of manually changing travel eSIMs at every border, use one plan that covers your route and let your phone select a supported local network. Automatic network selection is not automatic plan switching: crossing a border does not, by itself, tell your phone to activate a different country plan.
- To automatically switch esim plans crossing border, distinguish network selection from changing your active data plan.
- A-sim travel eSIMs suit travellers who want app-based usage tracking and top-ups.
- Use one regional or global plan only after confirming every destination is covered.
- Separate country eSIMs require selecting the correct data line; automatic network selection does not replace that step.
Why this matters
Your phone chooses a mobile network, while your travel plan determines where you can use data. Those are separate decisions. A network connection in the next country does not prove that your current plan covers it.
For a 2026 trip, build the workflow around your itinerary rather than a promised border trigger. A-sim offers global, regional and single-country travel eSIMs, with usage management and top-ups through its app. Check the destinations included in the particular plan before configuring your phone.
A-sim travel eSIMs are best for travellers who want to manage data usage and top-ups through an app. For border crossings, the practical question is whether one plan covers the whole journey or whether you need to change the active data line.
A multi-country plan removes a plan-change task when both destinations are covered. It does not guarantee uninterrupted service during a network handover, and it does not extend coverage beyond the plan's listed destinations.
Before you start
- Check your phone and access. You need an eSIM-compatible, carrier-unlocked phone, access to your travel eSIM installation instructions and an internet connection for setup. Keep those instructions accessible before leaving your current connection.
- Match the plan to the complete route. Include transit countries where you expect to use mobile data. For a trip through 2 countries, confirm both countries explicitly; a regional name alone is not enough.
- Check when validity begins. Installation and activation are not necessarily the same event. Follow the plan's stated activation rules before installing early, and remember that automatic network selection does not activate another country eSIM.
Use the menus below as an iPhone and Google Pixel reference. Android manufacturers use different menu names, and iPhone wording varies by region. If your phone uses Mobile Service instead of Cellular, use that equivalent menu; do not look for a border-switching button.
Route and plan configuration
Start by deciding whether you need a network handover or a plan change. That choice determines the rest of the setup, including which controls you should leave automatic.
Choose your crossing workflow
- List every country where you need mobile data, including any overland transit stop.
- Read the destination coverage and validity terms for the plan you intend to use.
- Choose one multi-country plan when it covers the complete route. Otherwise, prepare separate destination eSIMs and expect to select the next data line yourself.
- Save the installation instructions and coverage details somewhere you can read without mobile data.
Expected result: you know whether the same travel eSIM can serve the next country. You are not relying on a phone setting to fill a coverage gap.
| Workflow | Best for | Advantage | Limitation |
|---|---|---|---|
| One regional plan | A route within its listed destinations | Keeps the same travel data line across covered borders | Countries outside the listed coverage need another arrangement |
| One global plan | A route spanning several regions | Can reduce separate destination-plan changes | The global label does not mean every country is included |
| Separate country plans | A route requiring different destination coverage | Lets you choose a plan for each destination | Requires managing installation, validity and the selected data line |
For a 2026 itinerary, choose by listed coverage—not by the words regional or global. A-sim offers these travel eSIM categories, but the category alone does not establish the coverage of an individual plan.
Label your travel lines
- Install the chosen eSIM using its supplied instructions while you have an internet connection.
- On iPhone, open Settings, then Cellular, select the installed line and open Cellular Plan Label. Give it a destination or route name you will recognize.
- On Android, use the line-naming option in your SIM settings if your device provides one. Keep the name distinct from your home line.
- Record which label belongs to which destination before installing another travel profile.
Expected result: the line names tell you which eSIM to select. You do not have to remember which installation came first while standing at a border.
Phone data-line configuration
Your phone needs one deliberate choice for travel data. Keep your home line separate from that choice, especially if you leave it enabled for calls or messages.
Configure an iPhone
- Open Settings, then Cellular, and select your travel eSIM. Enable Turn On This Line.
- Return to Cellular, open Cellular Data, and select the travel eSIM as your data line.
- Turn off Allow Cellular Data Switching if you want to prevent automatic fallback between your home and travel data lines.
- Select the travel line and set Data Roaming according to its installation instructions. Travel eSIM instructions commonly require roaming because the eSIM connects through a partner network.
- Open Network Selection for that line and leave Automatic enabled for normal use.
Expected result: your iPhone uses the selected travel eSIM for cellular data and chooses a network automatically. It does not select another country plan just because your location changes.
Allow Cellular Data Switching is not a destination-plan selector. The setting concerns data use between enabled lines; it does not compare travel-plan coverage against your itinerary. Leaving it off gives you a clearer boundary between home data and travel data.
Configure a Google Pixel
- Open Settings, then Network & internet, then SIMs.
- Select the travel eSIM and enable Use SIM.
- Set the travel eSIM as the data SIM using Mobile data and any selection prompt your device displays.
- Set Roaming according to the travel eSIM's instructions.
- Leave Automatically select network enabled in the travel SIM's network settings.
Expected result: your Pixel uses the chosen travel SIM for data and selects a network without requiring a manual carrier choice at each covered destination.
Other Android phones organize these controls differently. Use the equivalent SIM manager to choose the data line, then check the roaming and network-selection controls for that same line. Do not assume a setting changed on your home SIM also changed on your travel eSIM.
For 2026 travel, verify the installed phone's menus before departure. A saved guide is useful, but the settings visible on your device determine which line is actually carrying data.
Border handover verification
The normal multi-country workflow is simple: keep the covered travel eSIM selected, leave network selection automatic and verify connectivity after arrival. Test only when it is safe to use your phone—not while driving.
Verify the connection after crossing
- Check coverage. Confirm that the destination is included in the active plan and that the plan remains valid.
- Select data. Confirm that the intended travel eSIM is still the selected cellular data line.
- Allow roaming. Check the travel line's roaming setting against its installation instructions.
- Test connection. Turn off Wi-Fi and load a small webpage. A network name or signal bars alone do not prove that mobile data works.
Expected result: a webpage loads through the travel eSIM in the new country. For a covered multi-country route, you have changed networks without changing plans.
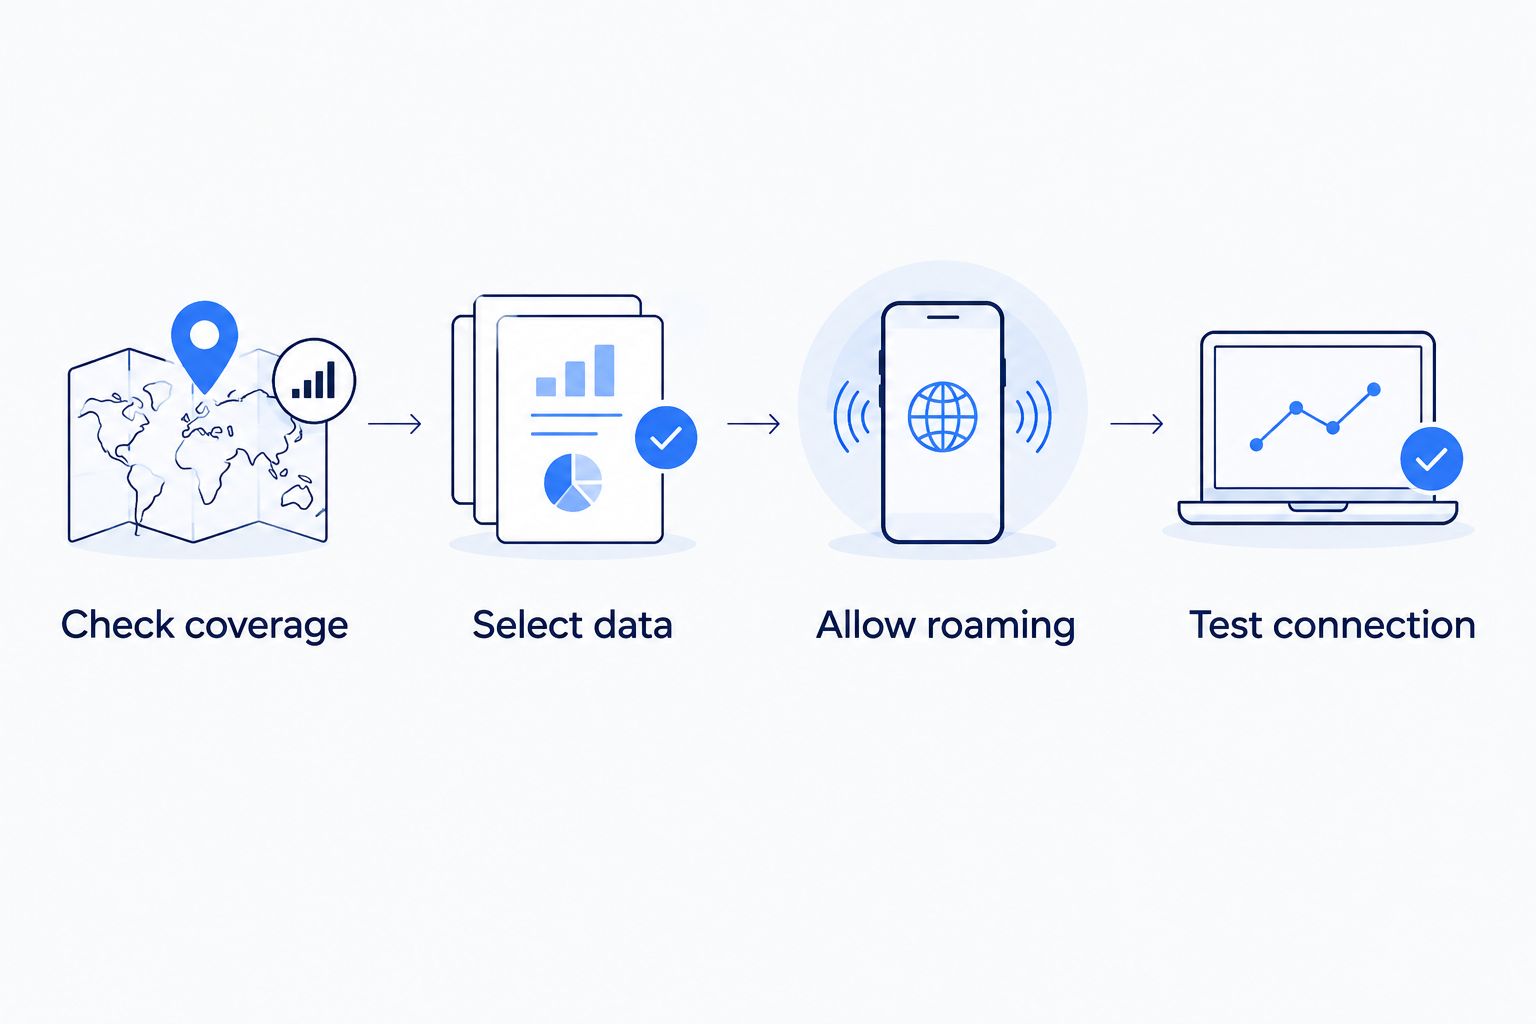
Make 2 checks before continuing your journey: confirm the selected data line, then confirm that a webpage loads with Wi-Fi off. These checks test different things. The first checks configuration; the second checks usable service.
A border does not create a precise radio boundary. Your phone can still detect a network from the country you left, particularly near the crossing. Judge the setup by plan coverage and working data, not by expecting the displayed carrier name to change at the checkpoint.
Second workflow: change country eSIMs after arrival
Separate country eSIMs require a different routine. You are changing the data profile rather than letting one profile register on another network.
- Before travel, read the destination eSIM's activation rules and install it when those rules permit.
- After entering its covered destination, enable that eSIM in your phone's SIM settings.
- On iPhone, open Settings, Cellular, then Cellular Data, and select the destination line. On Pixel, choose the destination SIM for Mobile data under Network & internet and SIMs.
- Apply the destination eSIM's roaming instructions and leave its network selection automatic.
- Turn off Wi-Fi and test a webpage before disabling the previous travel line.
Expected result: the new country eSIM supplies mobile data. The previous eSIM remains installed unless you deliberately remove it.
Do not delete the previous profile just to stop using its data. Selecting another data line or disabling a line is different from deleting its installation. Reinstallation depends on the provider's rules, so keep the profile until you have checked those rules.
For your 2026 route, a reminder is a useful prompt to check the destination line. It is not a substitute for checking coverage, validity and a working connection. Do not treat a location notification as proof that the phone changed plans.
Troubleshooting
Signal bars appear, but webpages do not load
Check the selected data SIM, the plan's destination coverage, remaining data and validity. Then check the travel line's roaming setting. If installation instructions specify an access-point configuration, follow those instructions exactly rather than entering settings from another provider.
The phone is using your home line for data
Select the travel eSIM explicitly. On iPhone, turn off Allow Cellular Data Switching if you do not want fallback between lines. On Android, inspect the default data SIM and any automatic data-switching option your manufacturer provides.
The next country is outside the active plan
Automatic network selection cannot fix missing destination coverage. Select an appropriate destination eSIM or a multi-country plan that includes the country. Check its activation instructions before changing the data line.
The phone stays on the previous country's network
Confirm that automatic network selection is enabled, then toggle airplane mode off and on to prompt a fresh connection attempt. If automatic selection still fails, use manual selection only with the supported networks named in your provider's instructions. Return to automatic selection afterward.
The second eSIM cannot be enabled alongside another line
Check your exact phone model's active-SIM limits. The number of profiles you can store is not necessarily the number you can enable simultaneously. Disable an unneeded line rather than deleting a profile, then enable the destination eSIM and select it for data.
Customize your workflow
Keep 1 travel data line selected at a time unless you intentionally configure a different arrangement. That makes usage easier to trace and reduces confusion when several profiles remain installed.
Use the A-sim app to review usage and manage top-ups. A top-up and a country-plan change are different actions: adding data does not, by itself, establish that a new destination is covered. Check the relevant plan details before relying on either action.
If your itinerary changes during your 2026 trip, revisit coverage before changing settings. The guide to switching eSIM plans mid-trip covers the adjacent workflow when your original plan no longer matches your route.
FAQ
Can my phone automatically switch eSIM plans when I cross a border?
Crossing a border does not, by itself, select a different country eSIM plan. A multi-country plan can stay selected while the phone automatically chooses a supported network in the next covered destination.
What's the best setup for using an eSIM across several countries?
Use one regional or global plan when its listed coverage includes your whole route. This avoids selecting a separate data profile at each covered border, but you still need to check validity and roaming instructions.
Does Allow Cellular Data Switching choose the right country plan?
No, Allow Cellular Data Switching is not a country-plan selector. It concerns cellular data use between enabled lines, not matching a travel plan to your destination.
Should I turn on data roaming for my travel eSIM?
Follow the travel eSIM's installation instructions for data roaming. Apply the setting to the travel line specifically; enabling it on your home line is a separate action.
Can I install the next country's eSIM before I arrive?
Check the destination plan's activation rules before installing it early. Some plans tie validity to installation or activation, while others use a first-network-connection trigger.
Why do I have signal but no internet after crossing a border?
Signal bars show a radio connection, not proof of usable mobile data. Check destination coverage, the selected data line, roaming settings, remaining data and plan validity.
Do I need Wi-Fi every time my eSIM connects in another country?
An installed, valid eSIM does not need Wi-Fi for ordinary mobile-network registration. Keep an internet connection accessible for installation or account tasks that require it.
Does topping up A-sim data add another country to my coverage?
Do not treat a top-up as proof of expanded destination coverage. A-sim supports app-based top-ups, but you must check the relevant plan details to establish where the data can be used.
One last thing
Your phone responds to radio networks, not border signs. A network handover can happen before or after the physical crossing, so a location-based reminder and a connectivity test serve different purposes.
Before departure, save the destination coverage details alongside your eSIM instructions. When service fails, that record helps you distinguish an uncovered country from an incorrect phone setting without guessing.